# Create a popout
This step-by-guide describes how to get started with popouts by adding popout capability to an example blade.
**📌 NOTE**\
To create popouts, you must be using Caplin Trader **version 3.10** or higher.
## 1. Create a new blade
First [create a blade](../bladerunner/bladerunner-creating-your-first-blade.md) named **popoutexample** inside the **presenter** bladeset.
## 2. Add popout tool to workbench
In the workbench of your **popoutexample** blade, add the following line to the _index.html_:
```js
workbench.addToRightWing(new caplin.workbench.popout.PopoutTool({ anyAllowed: true }), "Popout");
```
The first argument in the ``PopoutTool`’s constructor is a configuration object. The `anyAllowed` property specifies that the blade may set any properties it wants on the `Popout` object. More information on this configuration is [here,opts="nofollow"](https://docs.caplin.com/developer/api/caplin_trader/3/#caplin.popout).
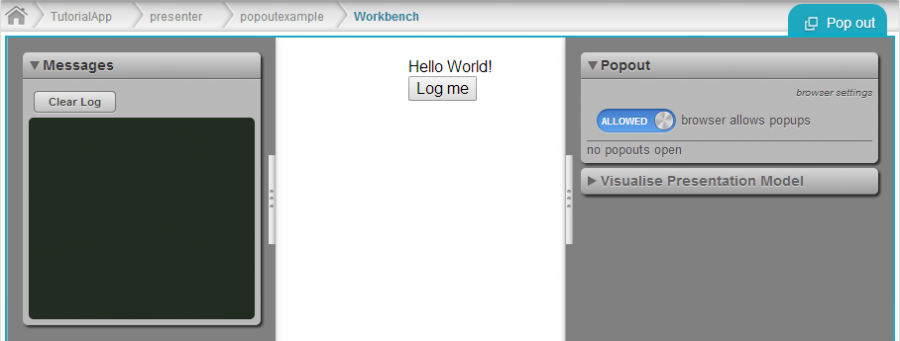
Now open the workbench and you should see the popout tool in the right panel.
## 3. Add basic popout functionality
Add a button to the popout blade’s _view.html_:
```html
```
Then add a handler for this button to the popout blade’s `ExampleClass` that instantiates a `Popout` object and opens it:
```js
caplinx.presenter.popoutexample.ExampleClass.prototype.popout = function() {
this.m_oPopout = new caplin.popout.Popout('popout');
this.m_oPopout.open(300, 200);
};
```
’popout'` is the relative URL of the page you want to load inside the popout window. `300` and `200` are the popout window’s width and height respectively.
## 4. Set window parameters and popout properties<
You can provide parameters to the `Popout` constructor that will be used to open the popout window. These should be passed in as a map, and should be the parameters allowed by the browser’s window.open() method. For example, you can specify that the window may be resized by the user:
```js
this.m_oPopout = new caplin.popout.Popout('popout', { 'resizable': 'yes' });
```
Additionally, you can set your own popout properties. These properties will be passed to the popout window after it has finished loading. You do this by calling the `Popout` object’s `setProperties` method with a map of properties and values.
Let’s add a textbox to our popout example, to allow the user to set a currency pair on the `Popout`. First we create a `currencyPair` presenter property in our `ExampleClass`:
```js
this.currencyPair = new caplin.presenter.property.EditableProperty('GBPUSD');
```
Then in our _view.html_, we can add an input field that is bound to the currencyPair property:
```xml
```
And in the `popout` method we created earlier, call `setProperties` on the `Popout`:
```js
this.m_oPopout.setProperties({
currencyPair: this.currencyPair.getValue()
});
```
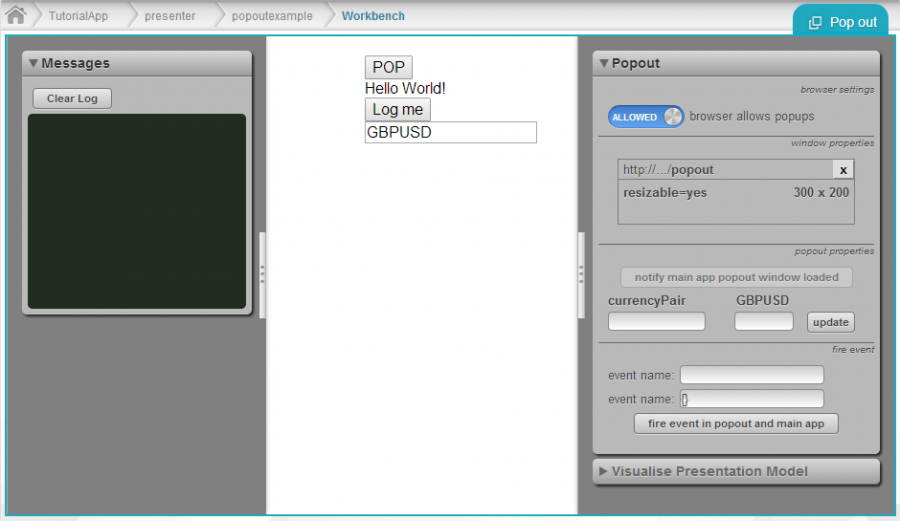
Test it out in the workbench. Click the POP button to pop out the component, and then in the workbench tool click "notify main app popout window loaded". You should see a new `currencyPair` property appear.
## 5. Add app and popout aspects
Create a new aspect for our "app", which is simply an _index.html_ file in a new folder _app-aspect._
```html
Tile App
<@css.bundle theme="standard"@/>
<@i18n.bundle@/>
<@js.bundle@/>
```
Then create an aspect for the popout window, called popout-aspect
```html
Popout App
<@css.bundle theme="standard"@/>
<@i18n.bundle@/>
<@js.bundle@/>
```
Since the app aspect is accessed by the URL /Example-App/simpleapp, we need to make sure we are pointing to the correct relative URL in ExampleClass:
```js
this.m_oPopout = new caplin.popout.Popout('../simplepopout', { 'resizable': 'yes' });
```
Now you can load the **simpleapp** in your browser and click on the POP button.
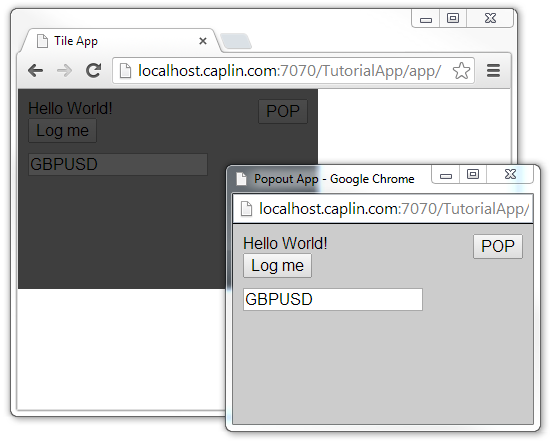
The above screen capture shows the popoutexample blade in the Example-App, which enables an overlay when the popout is opened, and listens to the POPOUT_CLOSED event to disable it when the user closes the popout window. For more information on popout events, see the API documentation [here,opts="nofollow"](https://docs.caplin.com/developer/api/caplin_trader/3/caplin.popout.html).