# Webcentric worked example
A tutorial to guide you through the actual process using Webcentric to create a customised application layout.
## Using Webcentric to create a custom application layout
In this worked example, we’ll walk you through the creation of a custom application layout. During the course of the tutorial, we’ll cover the creation of a layout composed of **Towers**, **Terraces** and **Stacks** of **Panels**, with extra features provided by **Decorators**.
**📌 NOTE**\
Before you start, you will need to have [installed BladeRunner](../bladerunner/bladerunner-installing-bladerunner.md) and imported the _FXTrader_ application which includes the _Grid_ and _Webcentric_ libraries and has some grids configured.
For the purposes of this tutorial, we’re going to be using _FxTrader_, with the application name `fxtrader` and with the application namespace `tutorial`.
_FxTrader_ comes with a default _Webcentric_ configuration, organised in the directory structure shown below. The Webcentric configuration lives under the **default-aspect**, as it is this part of the application which uses the layout manager. Other **aspects** developed, such as a _mobile aspect_, may also use the _Webcentric_ layout manager, and therefore will need to have the same directory organisation and configuration files within.
Take a look at the following configuration files, in order to understand how the layout is set up:
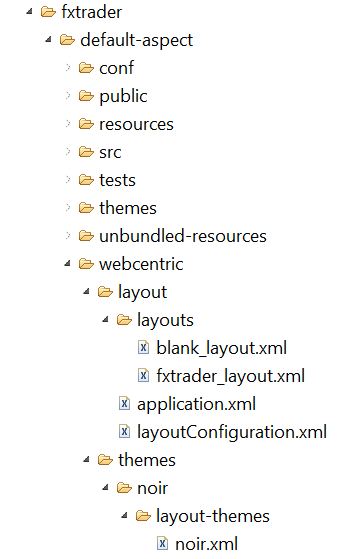
* **_layoutConfiguration.xml_** defines the list of available layouts, and the theme of the application (which corresponds to the theme’s directory name)
* **_application.xml_** defines the outer level _Webcentric_ configuration, which is common to all layouts and to all themes. It sets up the outer level of the GUI (in this case the **application layout stack**). When the configuration is processed by _Webcentric_, the contents of the layouts defined in _layoutConfiguration.xml_, will be nested as new pages under the empty `` in this common layout configuration.
* **_noir.xml_** in the themes directory, defines the _Webcentric_ configuration that is common to all layouts, but specific to the particular theme. This includes decorators for the layout, for which each theme can define different border colours, border widths, styles, etc...
* **_fxtrader_layout.xml_** is a particular layout configuration, which is referenced in _layoutConfiguration.xml_, as one of the application’s layouts, and that will be nested within the application-layout stack to complete the layout using the noir theme.
Now let’s get started modifying these files to create our own custom layout.
## Step 1: Creating a Basic Layout with One Panel
### Create an Application Layer Stack
We’ll start with the basics, so open the _application.xml_ file, and amend it using the code below (make sure you actually do keep the content of the `` element, and don’t just replace it with the comment telling you to keep it)!
```
default-aspect\webcentric\layout\application.xml
```
```xml
. . .
```
So, you’ve set out the configuration that’s common to all layouts in _application.xml_, which consists of a layout that contains just the application-layout stack, with no decorators applied. All the other components you create will be housed in this `[](https://docs.caplin.com/developer/xml/webcentric/latest/Stack.html)` element.
### Add a Panel with a Grid Component
Components in _Webcentric_ are housed in rectangular blocks called Panels. So, to place just one panel with a custom component inside our application, put the following code into _fxtrader_layout.xml_:
```
default-aspect\webcentric\layout\layouts\fxtrader_layout.xml
```
```xml
```
That will populate the layout with one panel, containing a grid component (created using _[Caplin’s Grid Library](../grid/index.md)_). You could have added a different component to the panel instead, such as a _Presenter_ component or a _Chart_. This panel will be nested in the applivcation-layout stack.
### Add the Configuration to the Database
The application’s _Webcentric_ configuration is stored in a database, which is accessed and deserialised when the application is launched. In order to see your first layout on screen, you’ll first need to load this new configuration into the database. There are two ways you can do this. The easy way is via the **BladeRunner Dashboard**, but if you happen to believe that relying on a GUI is in some way heretical, you can also do it via the command-line.
To reset the _Webcentric_ database using the Dashboard use the following steps:
1. Launch the Dashboard in your browser window (_BladeRunner_ will need to be running): http://localhost:7070/dashboard/#apps/fxtrader
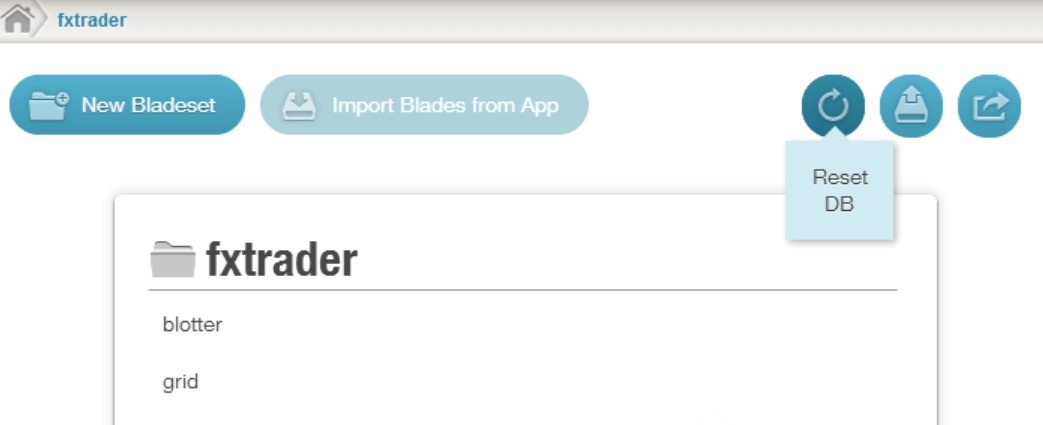
2. Click the "Reset DB" button. That’s pretty much it.
To reset the DB via the command-line, you’ll need to do the following:
1. From a command-line window in the _sdk_ directory of your _BladeRunner_ installation, first of all, stop _BladeRunner_ if it is currently running. `CTRL + C` should accomplish this quite efficiently.
2. Run the command to reset the _Webcentric_ database: `bladerunner reset-db fxtrader`
3. Start _BladeRunner_ with the command: `bladerunner start`
Once the database has been reset, navigate to http://localhost:7070/fxtrader/ in your browser (or click on "Launch App" in the dashboard) and this is what you should see:
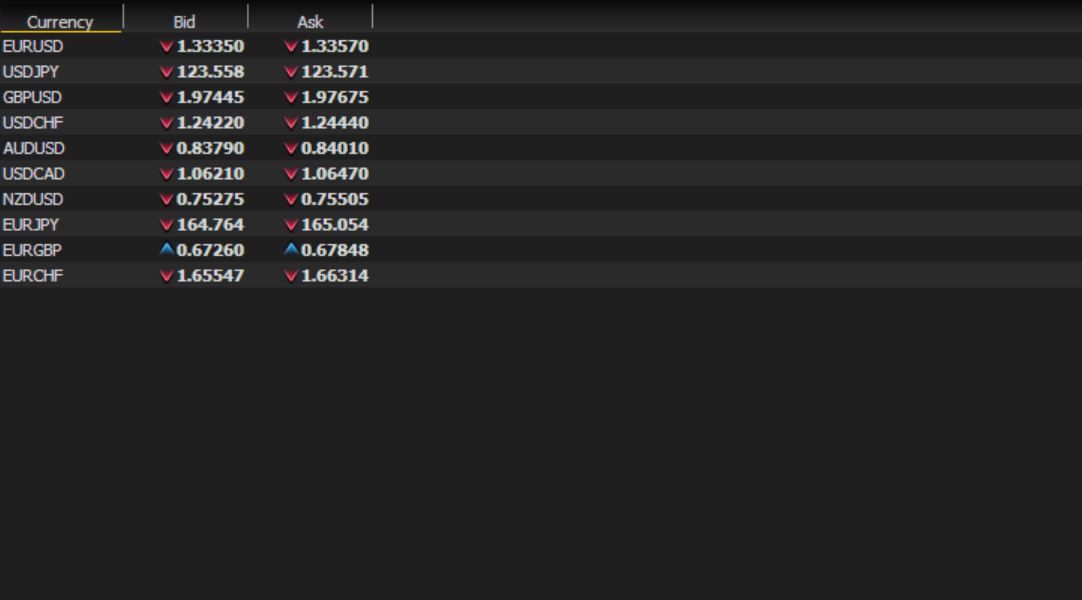
It’s not much to look at yet, but we’ve got the most basic possible layout done, and we’re going to be expanding on this throughout the tutorial.
## Step 2: Terraces, Towers and Stacks
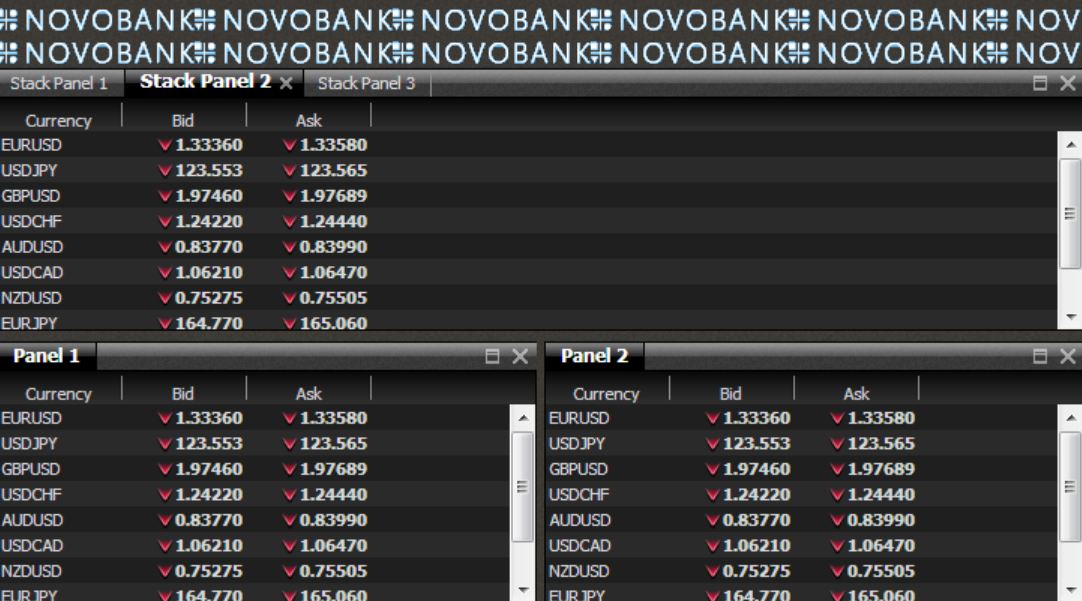
Let’s imagine that we have a layout in mind, which looks something like the diagram below. We want a fixed panel at the top, with the middle of the screen containing a set of 3 tabbed panels, and two adjacent panels at the bottom.
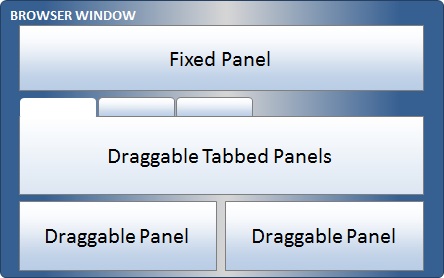
_Webcentric_ organises layouts as a hierarchy of ``[](https://docs.caplin.com/developer/xml/webcentric/latest/Tower.html)``s (for vertically aligned components), ``https://docs.caplin.com/developer/xml/webcentric/latest/Terrace.html``s (for horizontally aligned components) and ``[<Stack>](https://docs.caplin.com/developer/xml/webcentric/latest/Stack.html)``s (for tabbed components). Also, fixed panels need to be defined outside the application-layout stack, and movable ones within it.
### Create a Framework for Draggable Components
To achieve the layout above then, the fixed and draggable components will need to be handled separately. Looking at the draggable components first, you’ll need to set up a Tower with two tiers: the top tier will comprise a Stack with three panels, and the bottom one will be a Terrace with two panels. We can construct this as follows:
```
default-aspect\webcentric\layout\layouts\fxtrader_layout.xml
```
```xml
. . .
. . .
. . .
. . .
. . .
```
Note the `selected_ind` attribute in the `` tag. This determines which panel will be visible at the top of the Stack at first.
If you now paste the code from your original grid component into the new panels, and then reset the database again, your layout should now look like this:
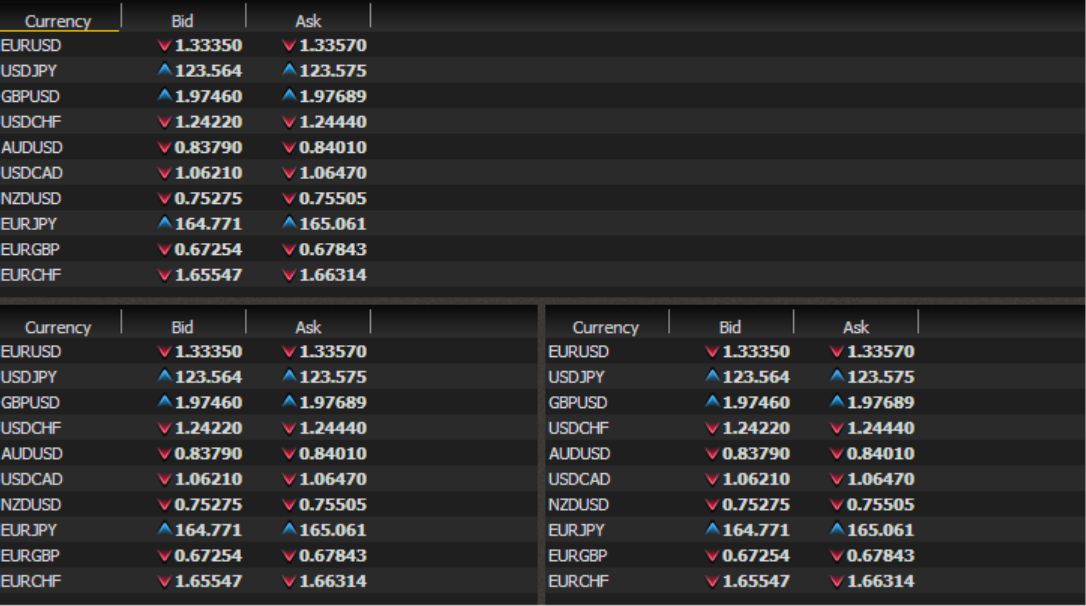
The Tower splits the screen in half vertically, while the Terrace splits the lower part of the screen in half horizontally. If you want to be able to resize the panels however, you can set the `splitters` attribute on these two layout components, to allow you to resize the panels.
You might be wondering where the tabs are on the stack, enabling users to switch between panels, and if you’re particularly observant, you might have noticed that our draggable panels cannot in fact be dragged yet. Both of these features are added using Decorators, which we’ll get to in the next step...
## Step 3: Introducing Decorators
Decorators are a form of configuration declaration that alter the layout components in some way. In this step you will be adding **Handles** to the draggable panels, so that each panel will have a title bar, and be able to be dragged and dropped within the layout. You’ll also apply a **Tabstrip** to the Stack, so that users can switch between the tabbed panels.
### Add a Handle Decorator to Your Panels
Take a look at the Decorator with `id` "basicDecorator" defined in the _noir.xml_ file. It contains a `[](https://docs.caplin.com/developer/xml/webcentric/latest/Handle.html)`, which will apply a _handle bar_ with a caption, to the panels it’s applied to. It also sets the attributes `drag_action` and `drop_target` with the value "SNAP_FRAMEITEM", so that the panel can be dragged by the handle and will snap into a position in the layout when dropped.
```
default-aspect\webcentric\themes\noir\layout-themes\noir.xml
```
```xml
. . .
```
To see the effect of this decorator, apply it to each panel in the layout, by adding the attribute `decorators="basicDecorator"`, like this:
```
default-aspect\webcentric\layout\layouts\fxtrader_layout.xml
```
```
. . .
. . .
```
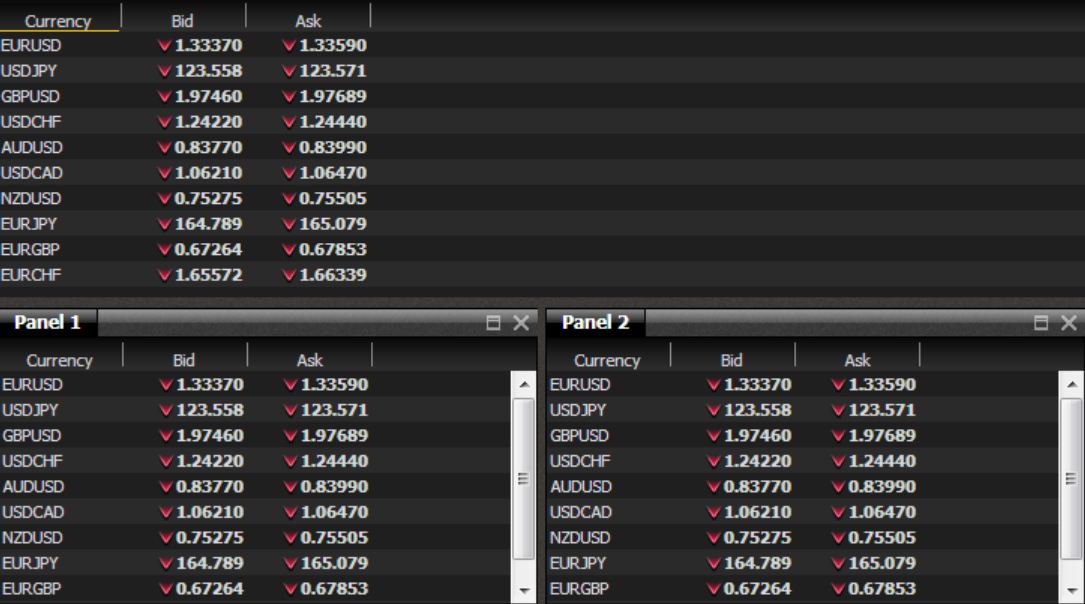
As you can see from the result below, this applies a caption to the panels in your Terrace, but not to those nested in a Stack. Since the captions for panels in a Stack must appear on the tabs themselves, it is necessary to apply a Tabstrip decorator.
### Add a Tabstrip Decorator to your Stack
If you go back to _noir.xml_, you will find a decorator with the `id` "stackDecorator". This contains a `[](https://docs.caplin.com/developer/xml/webcentric/latest/Tabstrip.html)`, which configures drag-and-drop on the tabs, using the same attributes as the Handle that you’ve just applied.
```
default-aspect\webcentric\themes\noir\layout-themes\noir.xml
```
```js
. . .
```
Apply this decorator to the Stack, as you did with the panels previously:
```
default-aspect\webcentric\layout\layouts\fxtrader_layout.xml
```
```xml
. . .
. . .
```
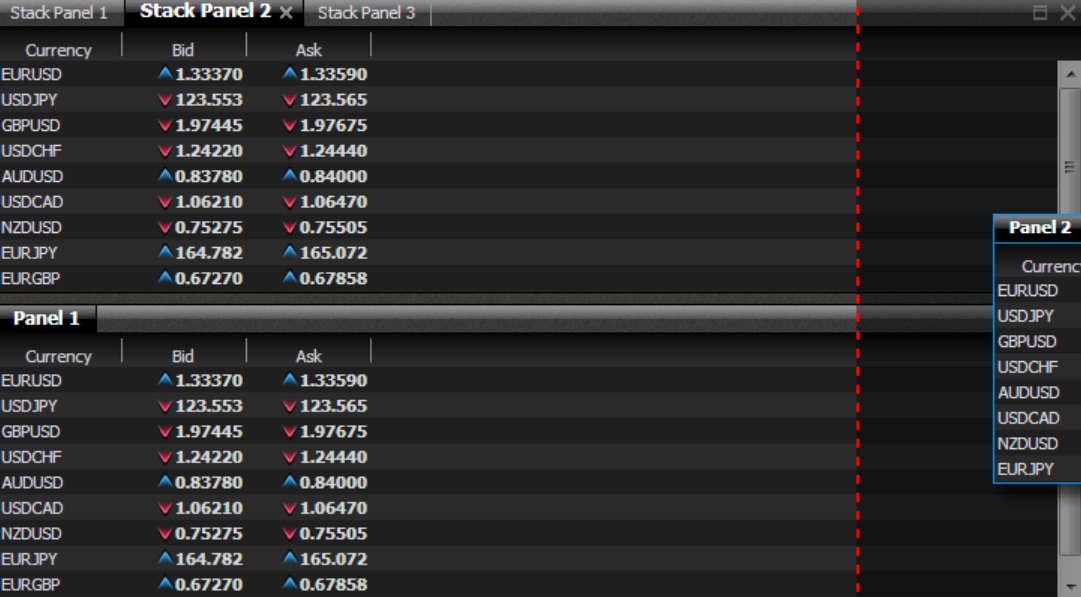
The tabs on the Stack should now be visible, and you can see the effect of the `selected_ind` attribute which you applied back in Step 2. You can also drag-and-drop each individual panel to alter the on-screen layout.
## Step 4: Fixed Panel and Styling
### Add a Fixed Panel outside the Application Layout Stack
The final part of our planned layout is the slim, fixed panel sitting across the top of the window. This panel needs to be created outside the application-layout stack, so you’ll need to alter _application.xml_ as follows:
```
default-aspect\webcentric\layout\application.xml
```
```xml
```
This creates a Tower, so that an empty panel will be added above the applicatio-layout stack, and also sets the height of the panel so that it doesn’t take up half the Tower (as it would do if we left it size itself). Setting the `fixed_size` attribute to "true" also prevents the panel’s height from being changed when the browser window is resized.
### Add Styling to the Fixed Panel
This top panel can be used to display a company logo above the application. To apply the logo, you’ve added a `style` attribute called "logoStyle". The CSS class applied to the Panel element will therefore be "_Panel_logoStyle"_. To style the panel in the _noir_ theme, we will then add the style in the _/themes/noir/_ directory as follows, in a file called _noir.css_:
```
default-aspect\webcentric\themes\noir\noir.css
```
```
.Panel_logoStyle {
background:url('images/logos/small.gif');
}
```
Having done that, the final layout should look like this: