# Write a header bar component
In this tutorial were going to create a new [Presenter](../presenter/index.md) component that will be used as a header bar in a [Webcentric](index.md) application. We will look at how to insert the component into our application as well as looking at the new [layout service,opts="nofollow"](https://docs.caplin.com/developer/api/caplin_trader/3/#caplin.layout.layoutservice) that simplifies the API around Webcentric layouts.
## Create a new blade & set up workbench
First we need to create a new bladeset containing a new blade, to do this we can use Caplin Trader’s dashboard. In our example the bladeset will be named `header` and the blade `bar`. For now we shall work on the blade in the workbench, and later inserting it into the application at the final step of this tutorial.
To prepare ourselves for the layout code, we will first add a [Layout Manager,opts="nofollow"](https://docs.caplin.com/developer/api/caplin_trader/3/#caplin.layout.workbench.layoutmanagerworkbenchtool) workbench tool to our blade’s workbench. This allows us to control all life cycle events of a layout. If we open _index.html_ in our _workbench_ folder, we can add the code to create the workbench tool (we can also remove the ones we don’t need).
```js
var layoutManagerTool = new caplin.layout.workbench.LayoutManagerWorkbenchTool();
oWorkbench.addToRightWing(layoutManagerTool, "Layout Manager");
```
## Add some style
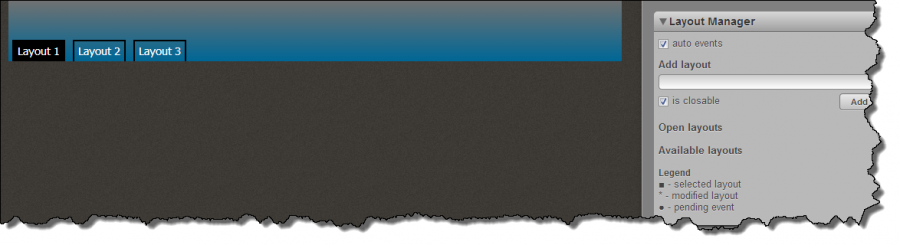
Well set our header bar height at 60px, and let the width take up all available space. We’ll also add some tabs to represent our layouts. A typical header bar would probably need some menus. You can refer to the [work with menus](webcentric-work-with-menus-trader-363-onwards.md) tutorial to see how you can create menus using the Menu API
Let’s begin with some HTML. Open our new blade’s template file (in _resources/html/view.html_) and replace the contents with those defined below (you may need to update the root namespace if necessary).
```html
```
Now let’s add some CSS to make our header bar more presentable. Add the following into your themes CSS file:
```
.header-bar-container {
position: relative;
height: 60px;
background-image: linear-gradient(to bottom, #727272 0%, #006796 100%);
}
.header-bar-container ul {
position: absolute;
left: 5px;
bottom: 0;
}
.header-bar-container li {
float: left;
margin-right: 10px;
padding: 5px;
border: 2px solid black;
border-bottom: none;
font-size: 14px;
color: white;
}
.header-bar-container li.selected {
background-color: black;
}
```
We also need to add some workbench specific CSS to set the width of our component. Once loaded in a Webcentric application, Webcentric will automatically manage any dimension settings. Open the _workbench.css_ file in _workbench/resources/style_ and add the following CSS into it.
```
.header-bar-container {
width: 800px;
}
```
Now if we open the workbench, we should see something like this:
## Using the layout service
The [layout service,opts="nofollow"](https://docs.caplin.com/developer/api/caplin_trader/3/#caplin.layout.layoutservice) provides a simple API to manipulate (open, close, select, etc.) the layouts in your application. Our simple header bar will display the currently open layouts and respond to any changes from the layout service (such as removing a layout from the list if it’s closed).
Open the _ExampleClass.js_ file in the blade’s _src_ folder and replace the constructor contents with this:
```js
this._layoutService = caplin.core.ServiceRegistry.getService('caplin.layout-service');
this.tabs = new caplin.presenter.node.NodeList();
this._updateTabNodes();
```
The `tabs` variable will hold the list of open layouts which the template will use to render them. The `_updateTabNodes` method will be responsible for getting a fresh list of open layouts from the service. By listening to layout events and calling this method whenever something changes, we can always display an up to date list.
```js
caplinx.header.bar.ExampleClass.prototype._updateTabNodes = function() {
var tabNodes = [],
openLayouts = this._layoutService.getOpen(),
selectedLayout = this._layoutService.getSelected();
openLayouts.forEach(function(layout) {
tabNodes.push(new caplinx.header.bar.Tab(layout, layout === selectedLayout));
});
this.tabs.updateList(tabNodes);
};
```
We also need to create a new presentation node that will represent our tab. Create a file named _Tab.js_ in the _src_ folder of the blade. The whole class looks like this:
```js
caplinx.header.bar.Tab = function(layout, isSelected) {
this._layout = layout;
this.name = new caplin.presenter.property.Property(layout.getName());
this.isSelected = new caplin.presenter.property.Property(isSelected);
};
caplin.extend(caplinx.header.bar.Tab, caplin.presenter.node.PresentationNode);
caplinx.header.bar.Tab.prototype.selectTab = function() {
caplin.core.ServiceRegistry.getService('caplin.layout-service').select(this._layout);
};
```
Now we can start listening for events on the layout service in our component. The layout service uses the [emitr](https://github.com/BladeRunnerJS/emitr) library to trigger events, refer to emitr’s [documentation](https://github.com/BladeRunnerJS/emitr) for more details. Add the following code to the end of the `ExampleClass` constructor:
```js
var layoutEventNames = caplin.layout.LayoutService.EVENT_NAMES;
this._layoutService.on(layoutEventNames.SELECTED, this._updateTabNodes.bind(this));
this._layoutService.on(layoutEventNames.CLOSED, this._updateTabNodes.bind(this));
this._layoutService.on(layoutEventNames.OPENED, this._updateTabNodes.bind(this));
```
Finally we need to update our template to use the `tabs` node list. Replace the dummy `ul` with the one below:
```xml
```
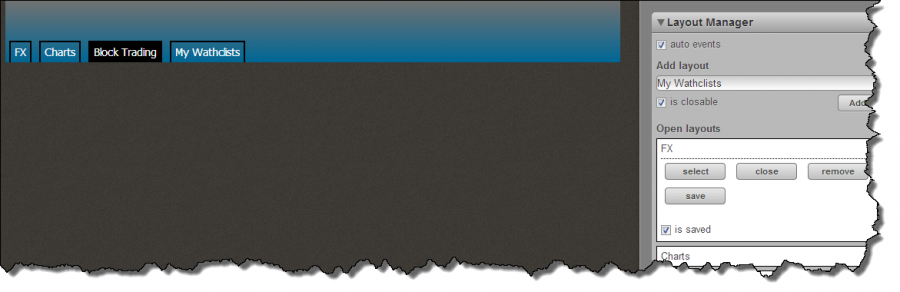
If we now go back to the workbench and use the [Layout manager,opts="nofollow"](https://docs.caplin.com/developer/api/caplin_trader/3/#caplin.layout.workbench.layoutmanagerworkbenchtool) tool to add and open some layouts, our component will display them. We can also select a different layout by clicking it; any changes will be immediately reflected in our component. The result should look something like this:
## Insert blade into Webcentric
In this last step we are going to insert our new header bar component into Webcentric so that it acts as our header bar in the full application.
Open your apps _application.xml_ file in _default-aspect/webcentric/layout_ and locate the `GUI` tag. Replace it with the one below:
```xml
```
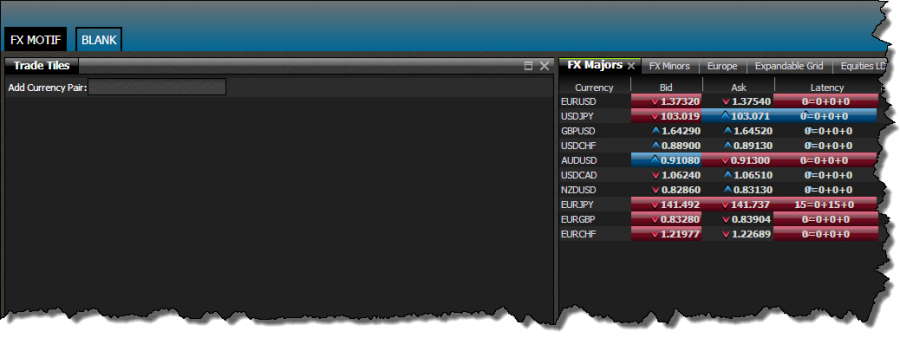
After saving the file we must also reset the Webcentric database, which can be done in the dashboard. If we load the full application now, our header bar will be displayed like so: